
Recording videos with OBS Studio is one of the most popular ways to capture gameplay, tutorials, livestreams, and presentations. It’s powerful, free, and highly customizable—but that flexibility can sometimes lead to frustrating issues, especially when your recordings come out blurry.
Many users notice that while their screen looks perfectly sharp during recording, the final video appears pixelated, soft, or lacking detail. This can be disappointing, particularly if you’re creating content for YouTube, social media, or professional use.
The truth is, blurry OBS recordings are rarely random. They usually result from a few common configuration mistakes or system limitations. Understanding these causes will help you fix the issue quickly and improve your recording quality dramatically.
1. Why Does My OBS Recording Look Blurry?
1.1 Bitrate Is Too Low
Bitrate is a key factor in video quality, determining how much data is used to encode your video and directly affecting its clarity and detail. If your bitrate is too low, OBS compresses the footage heavily, which results in a blurry or blocky appearance.
This is especially noticeable in:
- Fast-moving gameplay
- Action scenes
- Screen scrolling or transitions
고치다:
Increase your recording bitrate in
설정 → 출력 → 녹음
. For example:
- 1080p at 30fps: 8,000–12,000 kbps
- 1080p at 60fps: 12,000–20,000 kbps
Higher bitrate = more detail retained.
1.2 Resolution Mismatch
OBS uses two resolution settings: the Base (Canvas) resolution and the Output (Scaled) resolution. If these don’t match, OBS has to scale the image, which often causes blur.
For example, recording at 1920×1080 but outputting at 1280×720 will reduce sharpness.
고치다:
이동하다
설정 → 비디오
and ensure:
- Base Resolution matches your screen
- Output Resolution matches the base (for best clarity)
1.3 Poor Downscale Filter
When you do scale your video, the downscale filter plays a big role in image quality. Some filters prioritize speed over clarity.
Common options:
- Bilinear → fastest but blurry
- Bicubic → balanced
- Lanczos → sharpest
고치다:
Set your downscale filter to
란초스(36개 샘플)
for the best visual quality.
1.4 Weak Encoder Settings
OBS offers different encoders, and choosing the wrong one can reduce quality.
If you’re using CPU encoding (x264) with a very fast preset like “ultrafast,” OBS sacrifices quality to maintain performance.
고치다:
- 사용 NVENC(신규) if you have an NVIDIA GPU
- Or use x264 with veryfast 또는 faster preset
Avoid ultrafast unless necessary.
1.5 Low FPS or Dropped Frames
Blurriness can also come from motion issues. If your frame rate is too low or frames are dropping, moving objects will appear smeared or unclear.
고치다:
- Set FPS to 30 or 60 in 설정 → 비디오
- Monitor OBS stats for dropped frames
- Reduce system load if needed
1.6 Source Scaling Problems
If your captured source (game, browser, or app) doesn’t match your canvas size, OBS stretches it to fit. This stretching can cause noticeable blur.
고치다:
- Right-click the source, then select Transform → Fit to Screen
- Avoid resizing sources manually
- Match source resolution with canvas whenever possible
1.7 Display Scaling Issues
On Windows, display scaling (like 125% or 150%) can affect how OBS captures your screen. Instead of capturing the native resolution, it may record a scaled version.
고치다:
- Set display scaling to 100%
- Run OBS as administrator
1.8 Recording Quality Preset
OBS includes preset recording quality options, and using a lower-quality preset can impact sharpness.
고치다:
Choose:
- High Quality, Medium File Size
- Or Indistinguishable Quality
These presets ensure better clarity.
1.9 Hardware Limitations
If your CPU or GPU is underpowered, OBS may struggle to keep up, leading to reduced quality or dropped frames.
고치다:
- Lower resolution (e.g., 1080p → 720p)
- Reduce FPS (60 → 30)
- Switch to hardware encoding (NVENC)
1.10 Compression After Recording
Sometimes your recording looks fine locally but becomes blurry after uploading to platforms like YouTube. This is due to compression.
고치다:
- Record at higher bitrate
- Upload at higher resolutions (1440p or 4K)
- Avoid excessive recompression
2. Bonus Tip: Try the Simple OBS Alternative – Swyshare Recordit
While OBS Studio is powerful, it can be overwhelming—especially for beginners. If you don’t want to deal with complicated settings, a simpler screen recorder like Swyshare Recordit can be a great alternative.
Swyshare Recordit is designed for users who want high-quality recordings without spending time tweaking technical settings.
Key advantages:
- 🎥 원클릭 녹화 – no complex setup required
- ⚙️ Optimized settings by default – reduces risk of blurry output
- 🖥️ High-quality screen capture – supports original quality recordings
- 🎮 Smooth performance – ideal for tutorials and gameplay
- ✂️ Built-in editing tools – trim and refine recordings easily
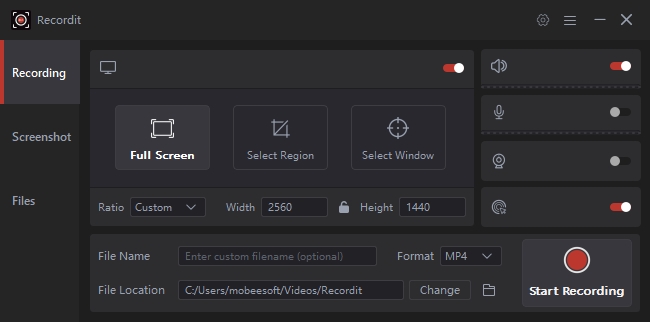
Unlike OBS, where you must manually adjust bitrate, resolution, and encoding, Recordit handles most of these automatically. This makes it especially useful for beginners or anyone who wants consistent results without technical hassle.
3. 결론
Blurry recordings in OBS Studio are usually caused by misconfigured settings such as low bitrate, mismatched resolution, or inefficient encoding. While OBS provides powerful customization options, it also requires careful setup to achieve the best quality.
By increasing your bitrate, matching your resolutions, choosing the right encoder, and ensuring your system can handle the workload, you can significantly improve your recording clarity.
However, if you prefer a simpler and more user-friendly solution, Swyshare Recordit is a strong alternative. With its streamlined interface and optimized recording settings, it eliminates many of the common issues that cause blurry videos in OBS.
In the end, whether you stick with OBS or switch tools, the goal is the same: clear, sharp, professional-looking recordings. If ease of use and consistent quality matter most, Swyshare Recordit is definitely worth trying.