
Screen recording is a convenient way to capture tutorials, app demonstrations, gameplay, video calls, or other activities on your iPhone. With Apple’s built-in screen recording feature, you can record what happens on your display and, when needed, add microphone audio to capture your voice or other sounds around you.
However, depending on what you want to record, the process can be slightly different. You may want to capture only the iPhone’s internal audio, record your voice through the microphone, or save audio without recording the screen at all. This guide explains several practical ways to record your iPhone screen and sound, along with a desktop solution for recording your iPhone screen on a PC.
1. Steps on How to Screen Record with Sound on iPhone
The easiest way to record your iPhone screen with sound is to use Apple’s built-in Screen Recording feature. You don’t need to install another application, and the finished recording is automatically saved to Photos.
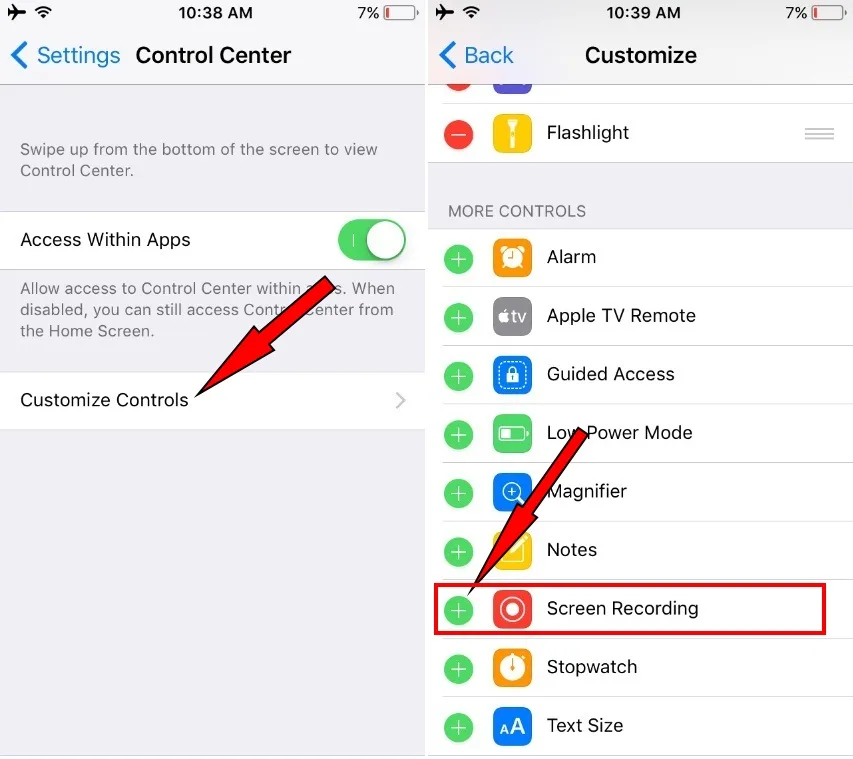
Step 1: Add Screen Recording to Control Center
Before recording, make sure Screen Recording is available in Control Center.
열려 있는 설정 > 제어 센터 그리고 추가하세요 화면 녹화 if it isn’t already included.
Step 2: Open Control Center
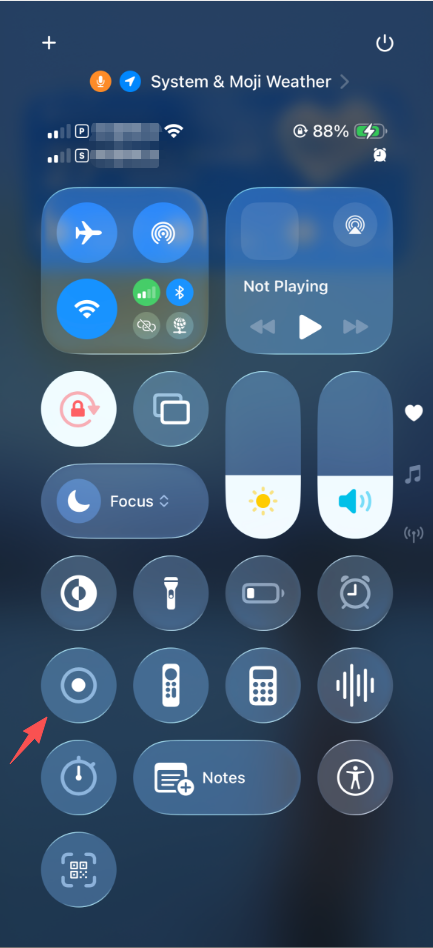
On an iPhone with Face ID, swipe down from the top-right corner of the screen. On an iPhone with a Home button, swipe up from the bottom.
찾아보세요 화면 녹화 button, represented by a circle inside another circle.
Step 3: Choose Your Audio Settings
If you only want to capture supported internal app audio, you can start the screen recording normally.
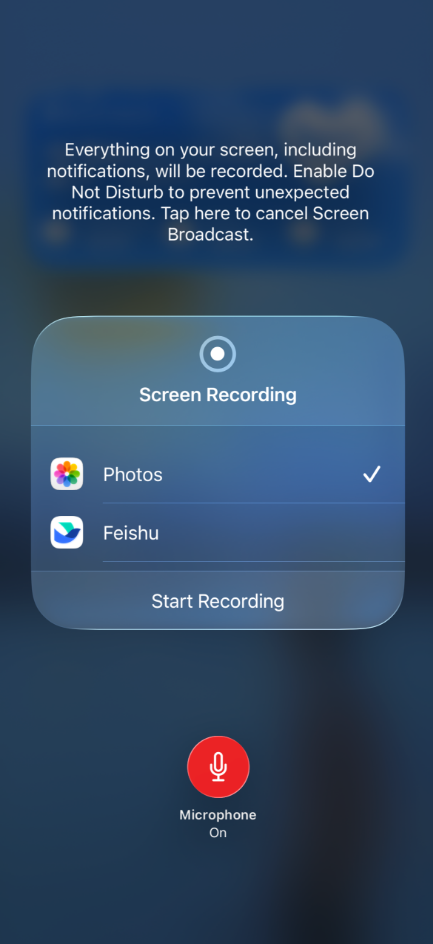
If you also want to record your voice or sounds around the iPhone , press and hold the Screen Recording button. Enable the 마이크로폰 그런 다음 쳐라 녹음 시작 to begin.
Step 4: Record the Screen
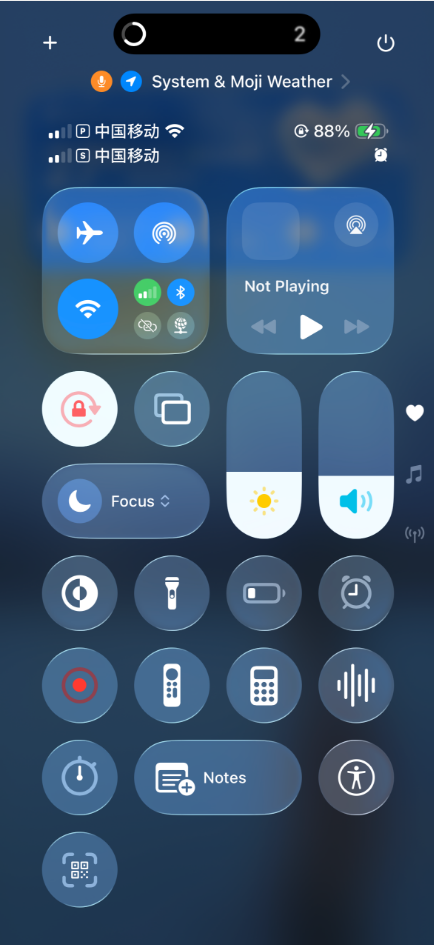
A three-second countdown will begin before the recording starts.
Once recording begins, perform the actions you want to capture. Your iPhone will record the screen while the microphone records external sound when enabled.
Keep in mind that some apps may restrict screen recording or prevent certain audio and video content from being captured.
Step 5: Stop and Save the Recording
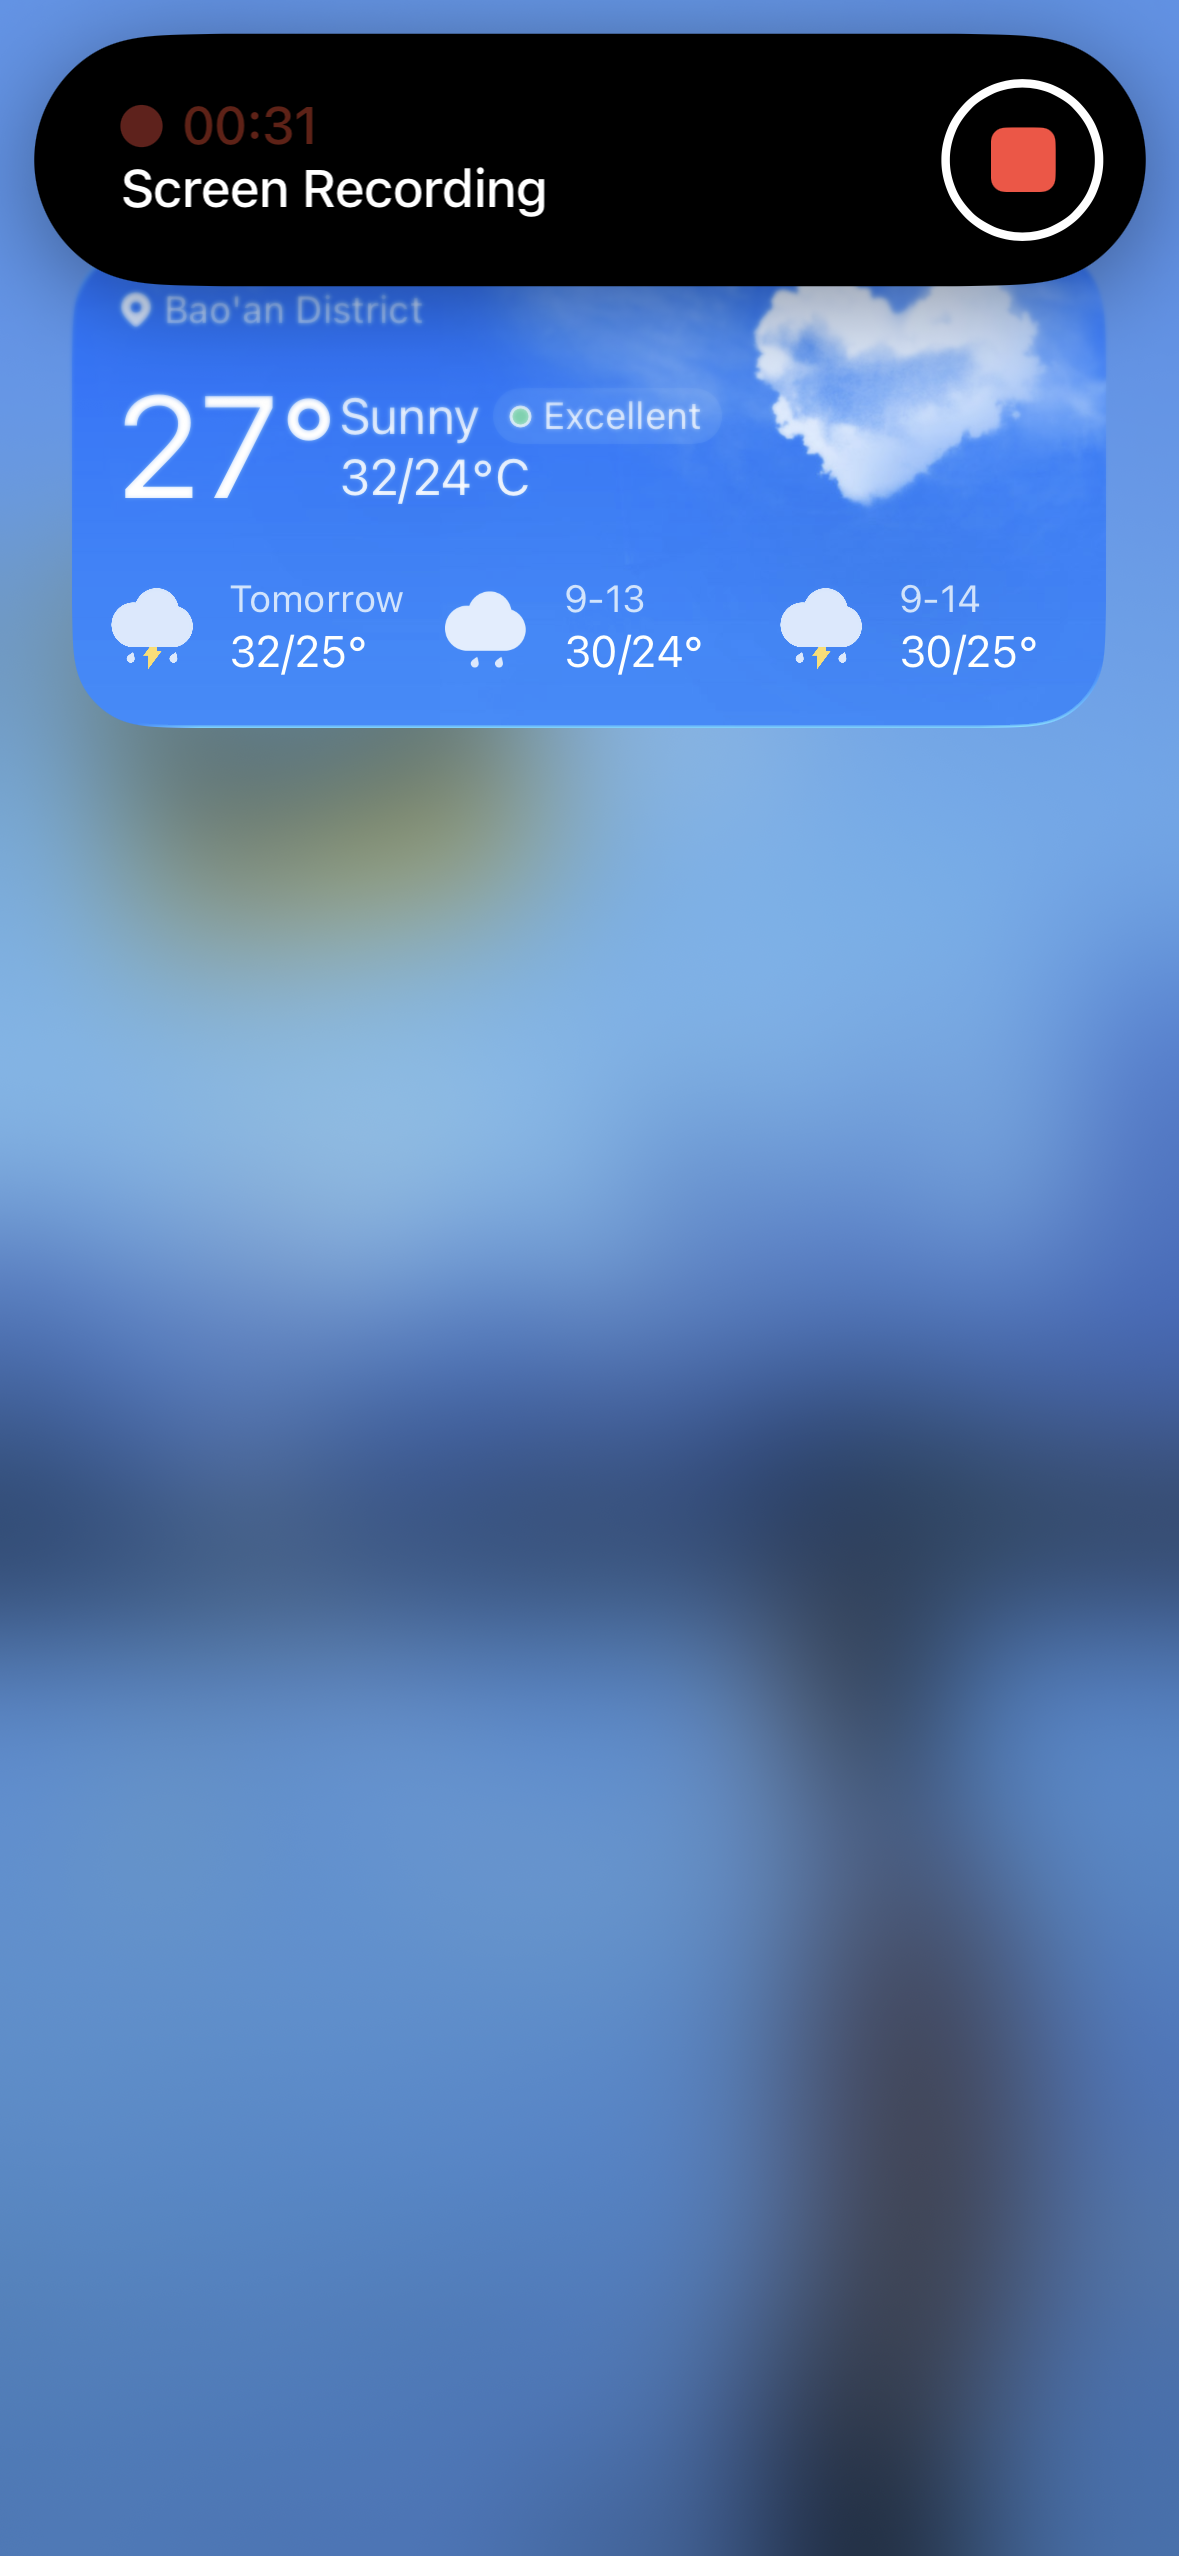
To stop recording, tap the red indicator at the top of the screen and select 멈추다 , or open Control Center and tap the Screen Recording button again.
The completed video will automatically be saved in the Photos app.
2. How to Record Just Audio on iPhone?
If you don’t need a video of your screen and only want to capture sound, you can use the iPhone’s built-in Voice Memos app.
Voice Memos is useful for recording conversations, voice notes, interviews, ideas, lectures, and other sounds picked up by the microphone.
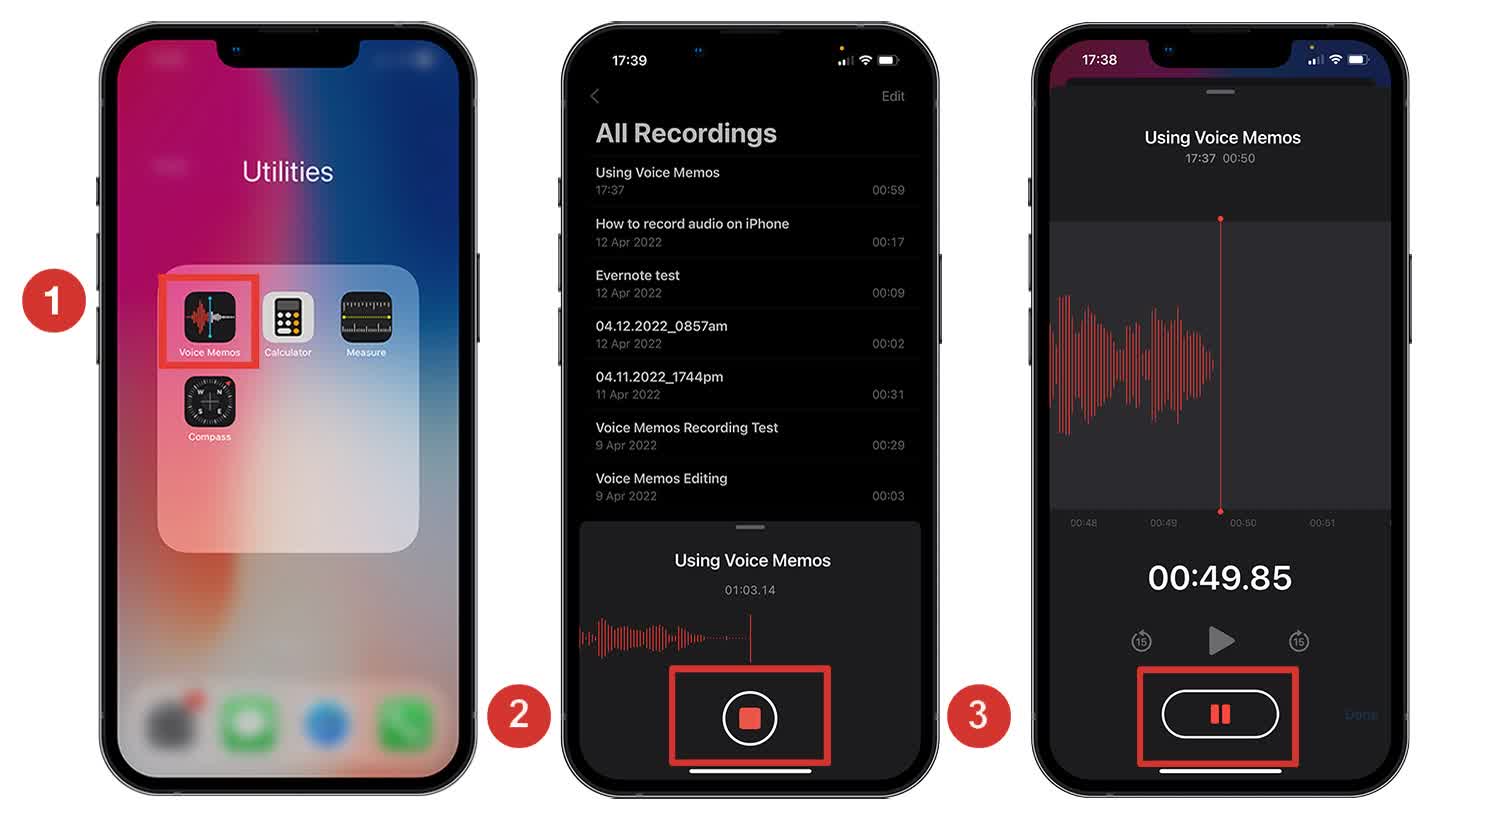
- Find and open Voice Memos on your iPhone.
- Tap the 기록 button to begin capturing audio. Speak toward the iPhone or position it where it can clearly pick up the sound you want to record.
- Tap the 멈추다 button when you’re finished. The recording will be saved automatically in Voice Memos.
- Select the recording to rename it, trim unwanted sections, or share the file through available sharing options.
If your goal is to capture audio from an app rather than your own voice, the situation is different. iPhone does not provide a universal built-in method for recording every source of internal audio as a standalone audio file. Some apps also restrict audio capture.
3. Bonus: One-Click Record iPhone Screen on PC with Swyshare Recordit
For users who want more control over their recordings, recording the iPhone screen on a computer can be a useful alternative. Swyshare Recordit is a desktop screen recorder designed to capture content from your computer and connected devices.
Instead of relying entirely on the small iPhone display and its built-in recording controls, you can mirror the iPhone screen to your PC and record it through Recordit . This can be particularly useful when creating tutorials, demonstrations, presentations, or longer recordings.
How to Record iPhone Screen on PC with Recordit :
- 다운로드 및 설치 Recordit Windows 또는 Mac 컴퓨터에서.
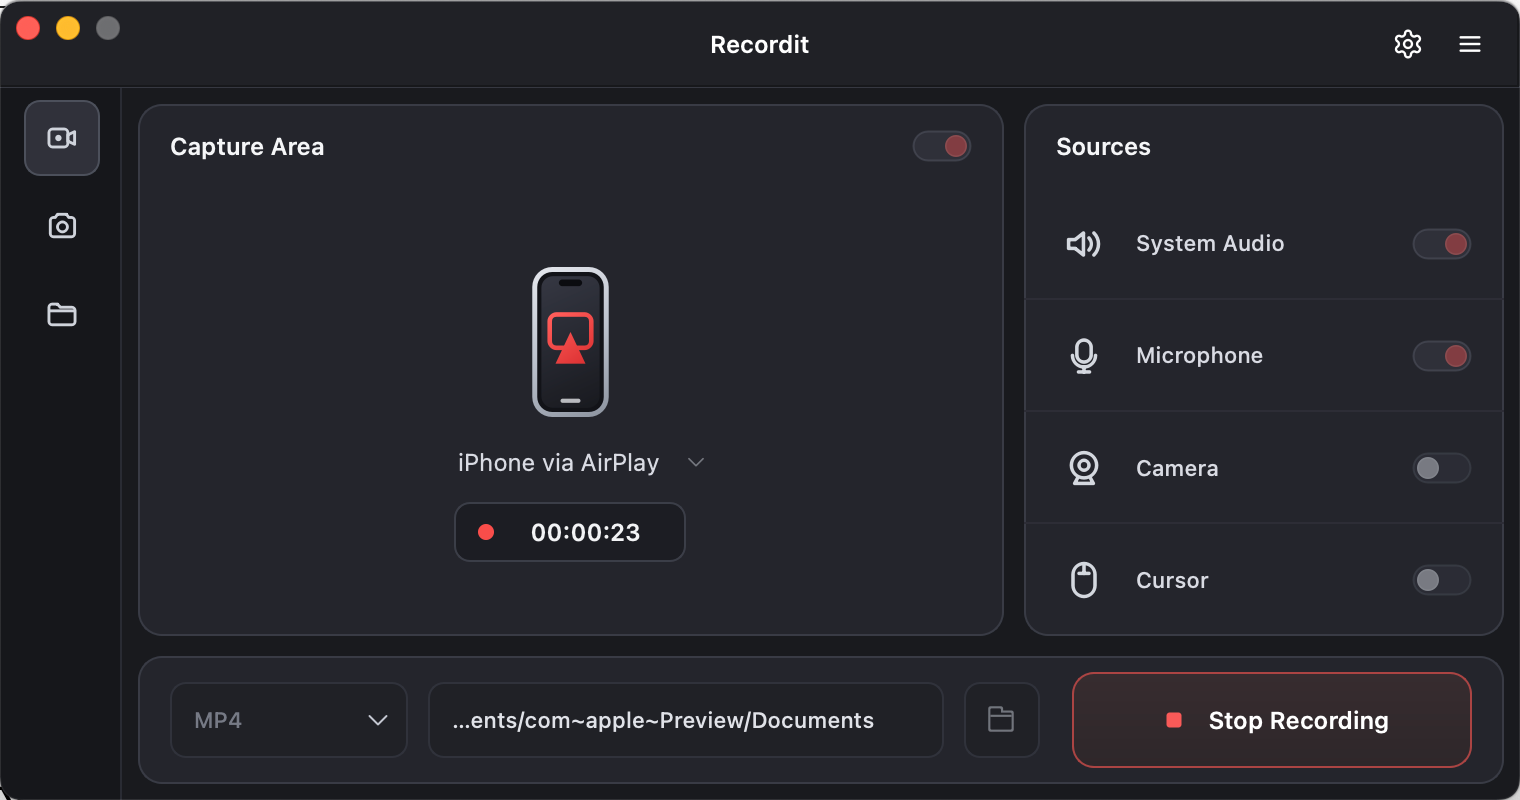
- In Recordit ’s interface, click the dropdown next to Display, select Receive iPhone via AirPlay and click Start Recording.
- On your iPhone, open Control Center and tap Screen Mirroring, then select Recordit from the available devices.
- Your iPhone screen will appear on the computer.
- Start using the iPhone while Recordit captures the displayed content.
- Click Stop Recording in Recordit when finished: Use the built-in video editor to cut and edit the recorded video if needed.
4. 결론
The built-in iPhone Screen Recording feature is the simplest way to capture your screen, while Voice Memos is a convenient choice when you only need an audio recording. For basic tasks, these native tools are usually enough.
However, if you want to record your iPhone screen on a PC, create longer tutorials, or manage phone screen recordings from a larger desktop interface, Swyshare Recordit offers a more flexible solution. With its iPhone AirPlay recording workflow and desktop recording features, Recordit makes it easy to capture your phone screen on your computer. For users who need more than basic mobile screen recording, Recordit is a practical choice for recording iPhone screens with greater convenience and control.